GENERAL INFORMATION
Measuring and installing stone countertops
For countertops bought from Loimaan Kivi we also offer a full-service package, which means we will measure and install the countertops you have purchased. You can also simply order the countertops and handle the measurement and installation yourself. Please note that Loimaan Kivi is not liable for any potential mistakes that happen during the installation in this case.
Preparations
Dimensioning natural stone countertops is as easy as for any other material. Picking natural stone as your material is an excellent, sustainable and stylish solution. When doing the actual measurement, all you need is a bit of care and good tools. If you are thinking about a more complicated countertop solution you can create a template model out of sturdy cardboard.
Before measuring
Make sure you have the following tools and blueprints with you:
- Tape measure (3–5m)
- A big try square
- A level (2 m)
- Templates for the corner countertops
- Cardboard for making templates and wide tape
- Scissors and a utility knife
- A metal ruler (1 m)
- A preliminary plan for the countertops and a layout drawing for the counters.
Plans & drawings
For the measurement to succeed you will need accurate plans and technical information.
- The countertop drawing from the preliminary order
- Plan for the kitchen furniture
- The model and make of your stovetop, and the size of the stove’s inlay hole
- The model and make of your sink, together with a plan with the dimensions, or a cardboard template
- See where the inlays are placed on the plans.
- Loimaan Kivi’s order form with plans
INSTALLATION INSTRUCTIONS FOR KITCHEN COUNTERTOP
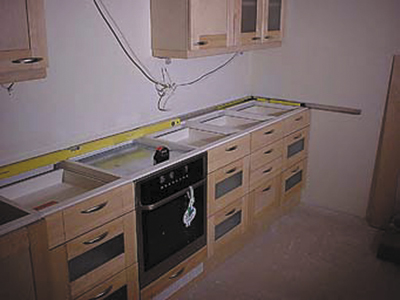
A. Start measurements
Start measuring from the corners and continue systematically along the walls.
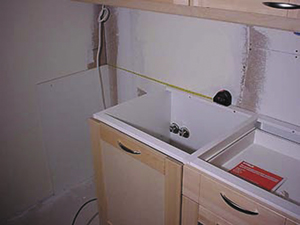
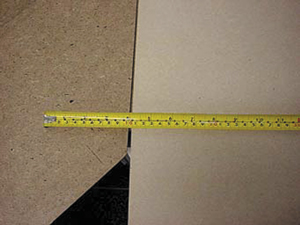
- Make sure the fixture is horizontal. (see image 1)
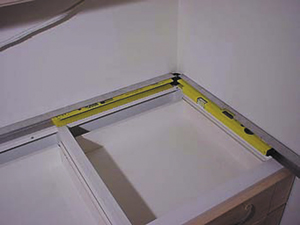
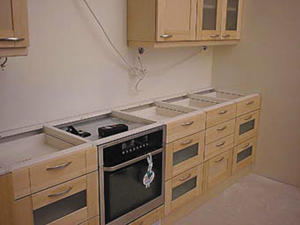
- Make sure the corners are right angled. (see image 2)
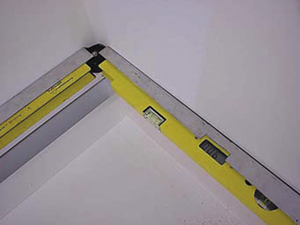
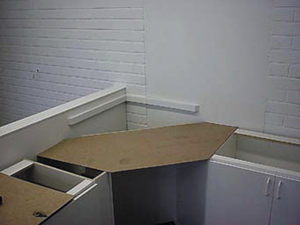
- Measure eventual deviation from right angles. (see image 3)
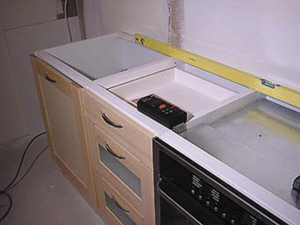
B. Dimensions
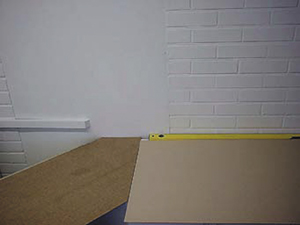
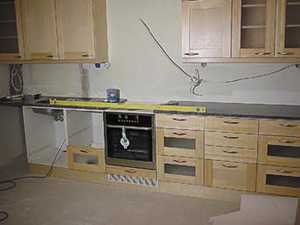
- Measure the length and width of the countertops and add them to the plan. (see image 4)
- When measuring the length of the countertops you should also leave room for seams and for the installation.
- If the countertop is longer than 2400 mm, place the seam at a place where the frame of the cabinet supports all four ends of the countertop.
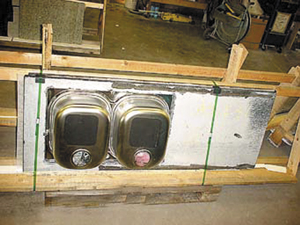
- Make sure there is space for a sink in the cabin below. (see image 5)
- Add to the plan the distance from the middle point of the sink to the end of the countertop, or the place where the inlay begins and, if necessary, the distance between the inlay and the side.
- Also add the internal dimensions of the cabinet.
- Other potential inlays, holes for the faucet or for batteries should also be measured from their ends and corner. Also note the diameter of the inlays.
- Make sure you make notes of everything and attach it to your order.
- Tell us the make and model of your stovetop and the distance from the end of the countertop to the center of the inlay. (see image 6)
- The size of the stovetop’s inlay can be found in the stove’s technical documentation, which should also be attached to your plans.
Please note:
- Stone countertops do not bend, nor do their dimensions change because of weather, humidity or the like.
- The cabinet frames however might move, which is why there needs to be room for seams.
Measure length and width.
C. Measuring a corner
When you are installing a countertop in a corner, start measuring from here:
- Always use a template for the corner. (see image 7)
- Regardless of if the walls are in right angles, measure straight in every direction.
- Compare the right angles of neighboring countertops (see image 8)
- Measure eventual deviation from right angles. (see image 9)
- Note down their dimensions and the deviating place.
Please note:
- The carboard corner template should be entirely still while you take measurements.
- Be very careful: A deviation of 1 mm at the seam is 10 mm at two meters.
INSTALLING STONE COUNTERTOPS
A. Receiving the product
- Check the packaging and the countertops visually.
- Move the countertops while in their packages as close as possible to where they are to be installed.
- If you are storing the countertops for a while before installing them, consider covering them with plastic to prevent paint stains and the like.
- Keep all instructions that came with the packaging.
- Open the plastic straps by cutting them, don’t pull.
- Carry the countertops upright to where you are installing them.
- Always carry from the sides, never lift where there is a hole.
B. Before installation
- The countertops should be room temperature when installed.
- Make sure by measuring and by comparing the dimensions of the cabinets that the dimensions of the countertops correspond to what you ordered.
- If something is wrong with the countertops, DO NOT INSTALL THEM. Instead, contact the manufacturer.
Please note:
- Do not destroy the packaging if there is something wrong with the countertops.
- Do not rest the countertops on their sides or on an uneven surface.
C. Installation
- Carefully lift the countertops into position.
- Place the countertops in their intended locations and make sure all seams and the like fit.
- If the countertop is not even on all sides or if the countertops are of different thickness you can use wooden wedges to even it out.
D. Gluing the countertops
- Stone countertops do not need to be separately glued to the cabinet frame, the seams between the countertops and the backsplash is enough to keep them in place. For very small countertops you can if you wish make sure it stays in place by using a few drops of silicone between the countertop and the cabinet.
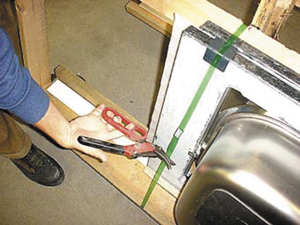
- Make sure the sink clips do not touch the cabinet frames. Enlarge the standing frame if necessary.
- Do not remove the clips from the sink.
- The seams between the countertops are glued together using a neutral cure silicone (without acetic acid or grease). Make sure the silicone you choose works with natural stone.
- Seal the seams between the structures around the countertops using silicone or an elastic sealant.
- After installation, remove all stains caused by the caulk or glue.
- Clean and seal the countertops, if the supplier of the stone recommends that the countertop is sealed.
- Read the maintenance instructions for the countertops and keep them for later reading.
Please note:
- Always treat the countertops with care.
- Do not knock them into furniture in the installation area.
- Installing the countertops means you have approved them.